I use WordPress to create my website. In case you want to learn using wordpress, I give you a very short summary how to start.
Xampp
In case you use a windows system you first need to install xampp, if not installed. You can download xampp on the apachefriends website.
Xampp will create a new folder. All your webcontend is usually saved in C:\xampp\htdocs\.
Than you go to download wordpress on the wordpress.org website. This is the english version. WordPress is available in many languages. You can go and find the downloadfile for your language. But don’t worry. After installation, you are requested to choose your language. After the download you unzip the folder. Than you go to the folder \xampp\htdocs\. You can rename that folder now, in case you want to. For my experimental projects I usually choose a name like wordpress-version-year. The name cannot content any blank space.
As next step the xampp-control.exe need to be executed.

We start the Apache and the MySql.
Database
Next to the MySQL we press the Button Admin. Create a new database as shown below.

Choose a database name and a charset. I ususally choose an utf-8 charset. You can name your database with the same name as the folder, easy for you to find the connected database for each project.
WordPress
Now it is time to open the folder we created before in the browser. In the address bar of your browser, type localhost/yourfoldersname and open it.
In the first step choose your preferred language. Than you need to enter your choosen database name. The database’s user is root. The password is empty and other fields can just be ignored. Then run the installation. Now enter a title for your website. Furthermore you choose a name for the administrator. Because we are doing an local installation, the username and password is not importand. You can choose something like admin and password. But for an installation planed to be published, you should use an username that is hard to guess, containing alphanumeric characters, spaces, underscores, hyphens, periods, and the @ symbol. The password should be long with different special characters. Your passwords should be stored in an encrypted password database (Example: key pass)

Enter all necessarry information and press the “Install WordPress” button. Now you can log in. You will find the wordpress welcome page and in case you like you can clean up everything a little bit.
Clear Up
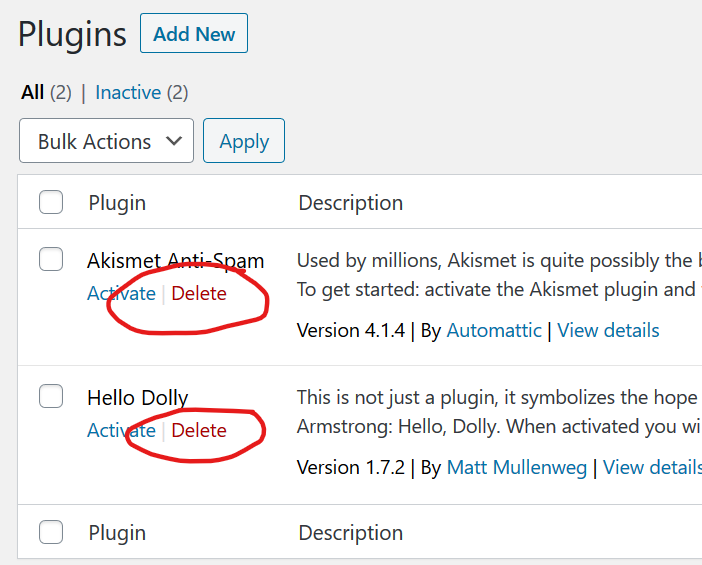
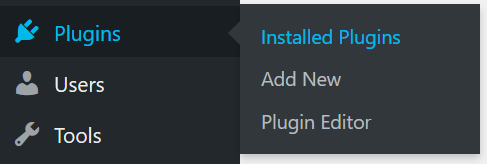
Go to -> Plugins -> Installed Plugins and delete every plugin you don’t need.
Now you can go to -> Appearance-> Themes and click on Details for every Theme which is not activated. Then click on -> Delete.
I prefer not to install every possible plugin. Because of safety reasons I only install the very necessarry plugins or try to find another way to how I can get what I want.
Child Theme
In case you want to change a lot of your appearance in your wordpress, I highly recommend to create a child theme.
First you create a folder themename-child inside the folder themes in your wordpress installation folder, should be something like C:\xampp\htdocs\wordpress\wp-content\themes\twentytwenty-child\. Inside that folder you create a file styles.css with following content (can be opend with any editor):
/*
 Theme Name:   Twenty Twenty Child
 Description:  This child theme is for the customisation of the Twenty Twenty theme.
 Author:       Kaijie
 Author URI:   http://www.kaijie.de
 Template:     twentytwenty
 Version:      1.0
 Text Domain:  twenty-twenty-child
*/
You can make some changes, the only important change is to fill in the parent’s themes folder’s name next to “Template“.
Now you create another file in the same folder, named functions.php and enter following content (with any editor):
<?php
function child_theme_styles() {
   wp_enqueue_style('parent-style', get_template_directory_uri() . '/style.css' );
   wp_enqueue_style('child-theme-css', get_stylesheet_directory_uri() .'/style.css' , array('parent-style'));
}
add_action('wp_enqueue_scripts', 'child_theme_styles');
?>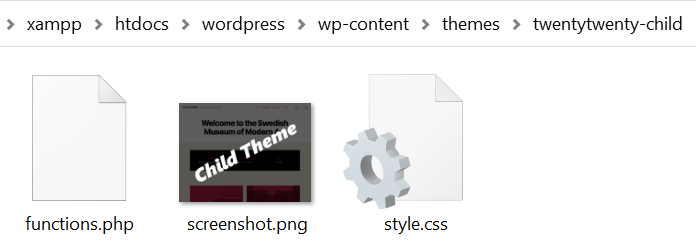
In case you want a picture as preview for your theme, go to the themes folder, in my case it is the folder twentytwenty. Copy the file screenshot.png and put it into your child folder. If wanted, you can write a text like “child” on that image file, easier to distinguish between both.
Now you go to the -> Appearance -> Themes again to activate your child theme.
Optional
Get rid of the “Powered by WordPress”
First go to the folder xampp\htdocs\wordpress\wp-content\themes\twentytwenty (depending on your theme name) and copy the file footer.php. Put the file into your child theme folder. Now you go to -> Appearance -> Theme Editor and open the theme footer file.
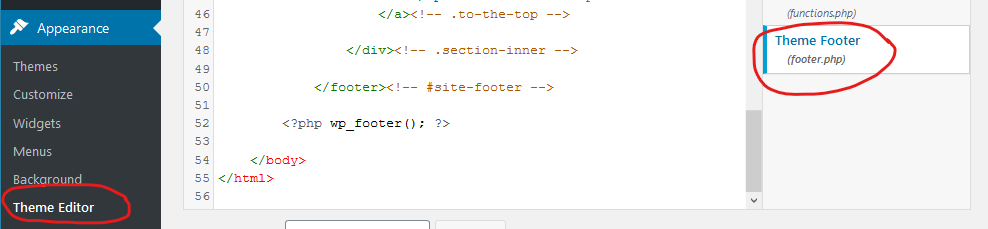
Find the part in that file where the text is written. In case it is not easy to find for you, enter Ctrl + F and write down the text to find it easily. In case you are using the twenty twenty theme, you can delete the whole paragraph where is written (all 5 lines):
<p class="powered-by-wordpress">
...
</p>
After you deleted all that go to your website, reload it an see the result.
Install Elementor
I just new discovered the plugin “Elementor”. It seemed to be a nice tool to create posts and pages.
Go to -> Plugins -> Add New and search for “Elementor”. Install and activate it. Now when you open a page or create a new one, you have the option to use “Edit with Elementor”.

To be continued …